How to integrate a Notion database with Webstudio
Learn how to use Webstudio's advanced website builder to create a Notion frontend, including an overview page with filters, a details page, and a sitemap.
Disclaimer: Using Notion Page content in Webstudio is impossible (for now), so it is only for Database properties.
By the end of this tutorial, you will have the following using your Notion database and Webstudio:
An overview page – One page that contains all the records in your Notion database, each with a link to view that record on a details page (a dynamic page).
A details page – A template displaying the record/row matching the record viewed. If the user is on /events/birthday, the Dynamic Page will fetch the Notion record matching "birthday" and display its contents.
A filter on the overview page – A filter that lets users find events in the past, within the next week, and within the next year.
A sitemap – A dynamic sitemap containing the various database records in Notion to help with search engine indexing
A lightweight Notion template is in the Marketplace. To start a new project, clone the template. To integrate with an existing project, visit the Marketplace and insert the various pages.
Webstudio is a visual website builder that connects to Notion
Webstudio is solely focused on creating a visual builder for the frontend. It's backend agnostic, meaning we don't lock you into using any one backend/CMS/database. You can build a website on your custom domain and fetch data from your Notion Workspace.
In the case of Notion, this enables you to leverage your current databases and the ease of use that comes with them. Webstudio enables you to build a custom frontend for your Notion data without writing code. Webstudio is mainly a no-code platform, however, it's also optionally a low-code platform to enable custom logic.
Webstudio is open source, has all CSS properties, and is dynamic at the speed of static.
Why Notion
Notion is where many teams and individuals already manage content, typically in preparation for adding it to their website. By integrating the website builder directly with Notion, people can avoid the unnecessary step of manually transferring the data to the website.
Use Notion Databases (not Notion Pages)
You can use Webstudio as a Notion website builder for any properties in your database. Notion Pages cannot be fetched in Webstudio.
Notion Pages cannot be used because the Notion API requires three calls to fetch the necessary data.
Fetch the database item – Notion Pages don't contain any properties. You need properties to manage SEO settings such as meta title, meta description, and slug, among other data for managing a blog.
Fetch page content – The first call provides an ID to fetch Notion Page content, a wrapper for the actual content.
Fetch block content – The Notion Page call provides an ID to use in the third call, which fetches the various blocks within a page (e.g., title, paragraph, link, etc.).
Synchronously calling three APIs would lead to slow performance for your visitors.
Steps to building a website using Notion data
This example uses the Notion events functionality, enabling you or clients to add events to the website without actually having to touch the website.
It can be adapted to other types of data, such as team members, business data, etc.
1 Create a dynamic page
In this step, you will create a Dynamic Page in Webstudio. Think of it as your record template – one page that dynamically changes based on the URL. The URL will contain a dynamic path, and its value will be used to get the record from Notion.
Go to your Webstudio project > Pages > Create a new page.
Add a path with at least two segments in the Dynamic Path field. This example uses the path /events/:slug.
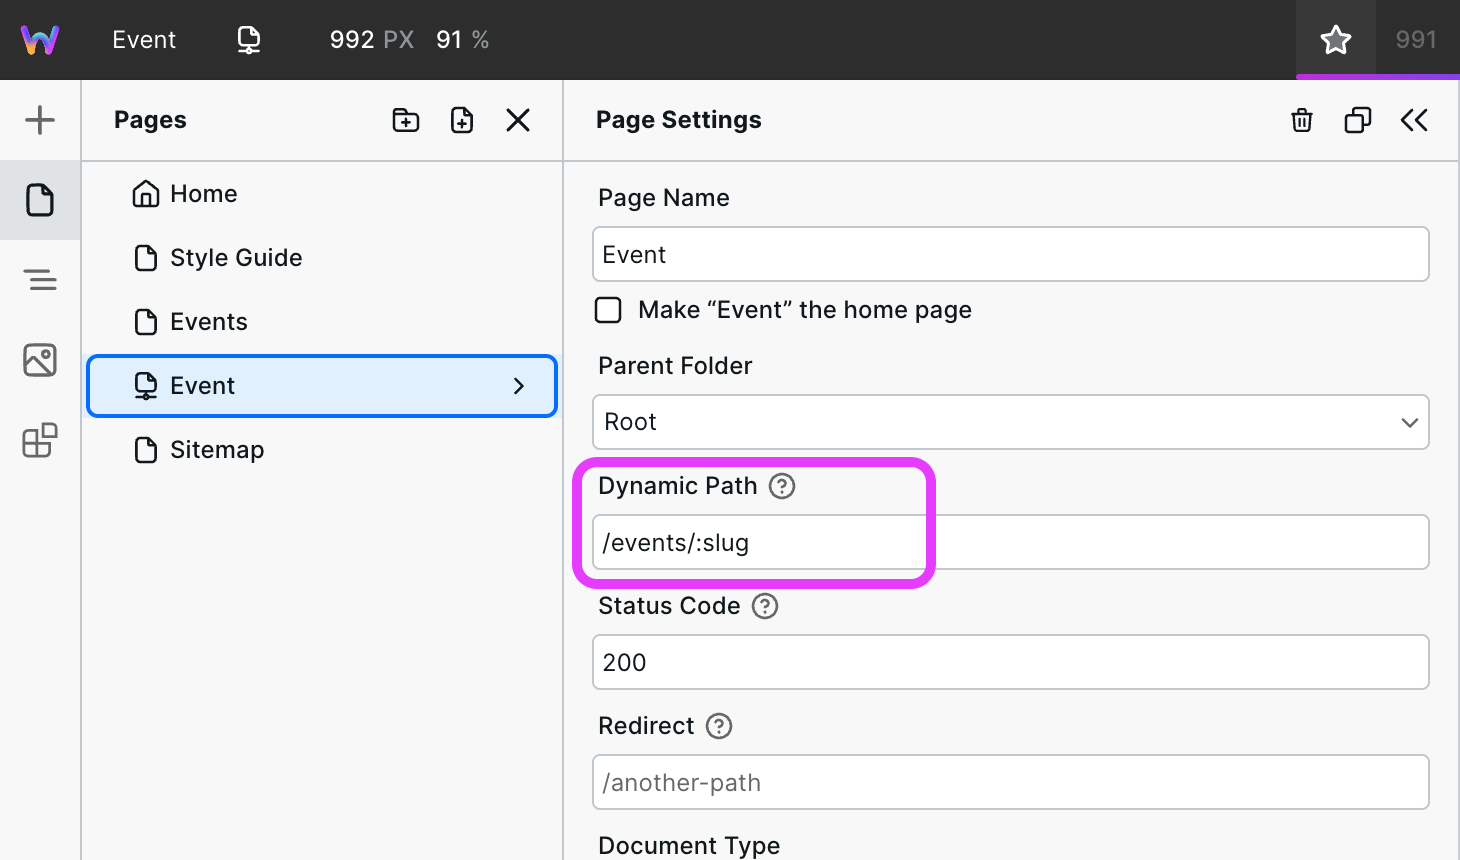
The first segment should be something to describe your records (e.g.,
events)The second is a dynamic component. You can name it whatever. This example uses
:slug. The value will be used in the following steps.
2 Fetch Notion data
In this step, you will configure a Resource in Webstudio to get data from Notion.
Create a Resource variable
Go to the Navigator on the left > select Body > Settings on the right > and create a new variable with any name (this example uses "Notion Data"), and in type, use Resource.
While the URL and remaining fields can be manually entered, there is also a shortcut – you can paste in a curl command, and Webstudio will automatically parse it and populate the respective fields. To get the curl command, go to Notion's filter database entries doc.
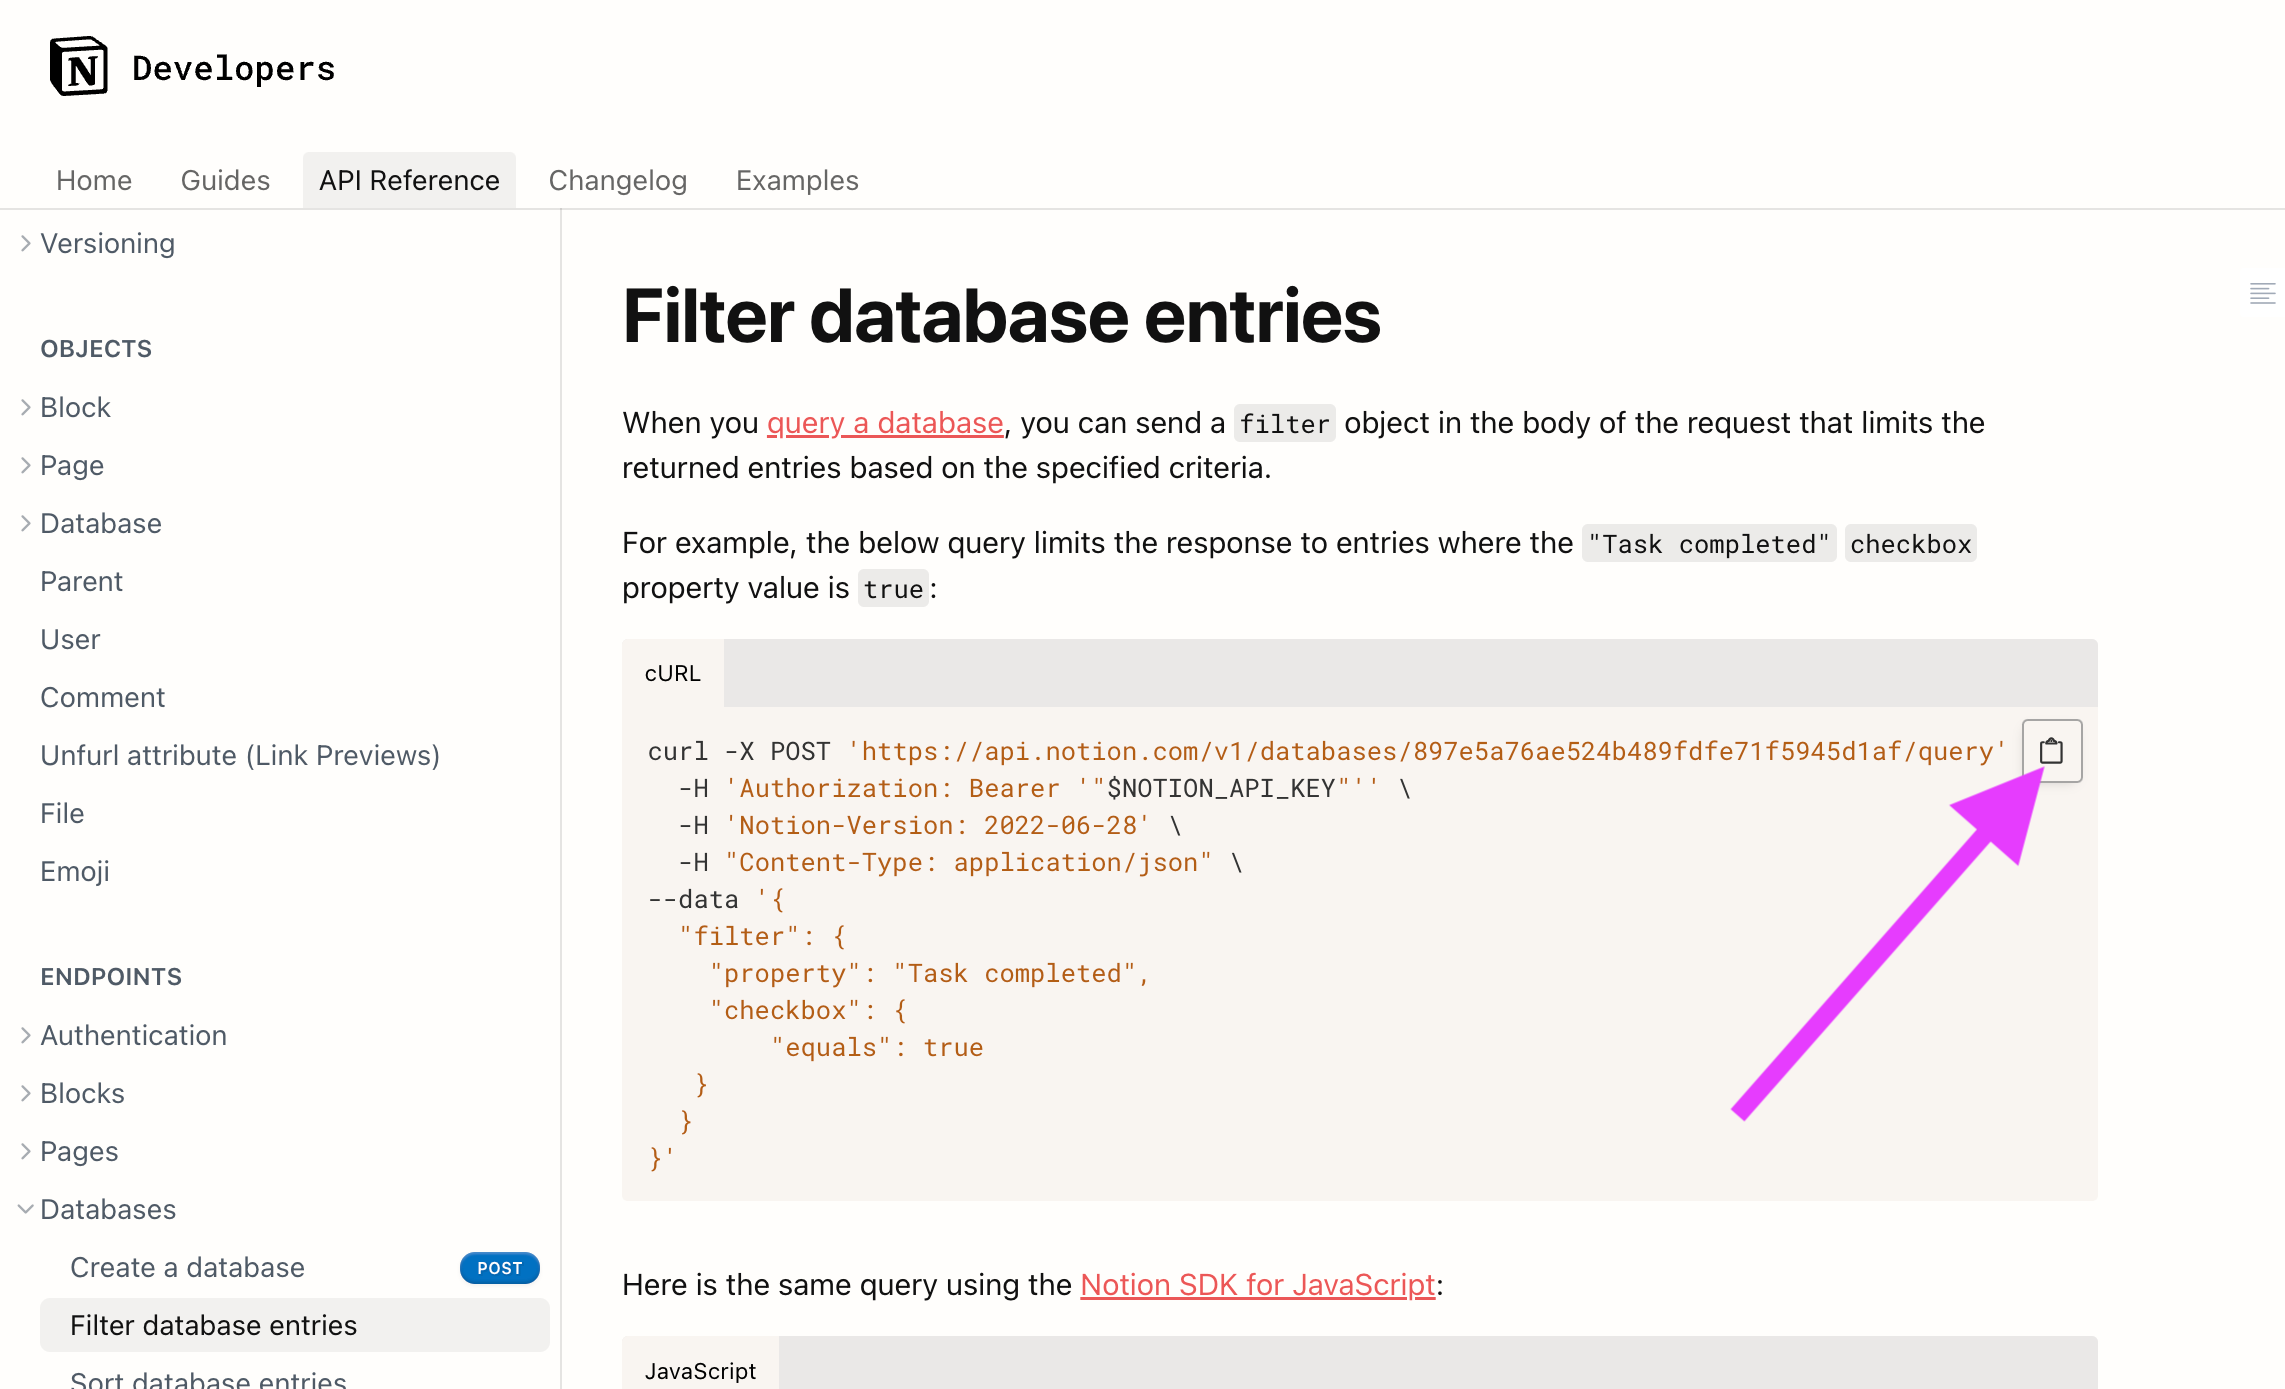
Copy the curl command as shown in the image, then paste it into the URL field in the Resource.
Now, you need to add several customizations to it.
First, replace $NOTION_API_KEY with your API key, which you can get by creating a new integration. Make sure you keep Bearer in front of the API key.
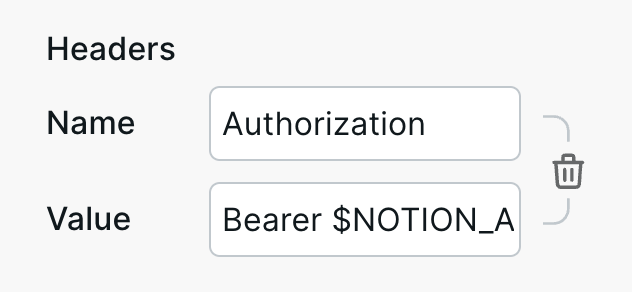
Second, you must modify the URL to include your database ID. If you are in a web browser, go to your database, and it'll be in the URL. If you are in the app, go to your data, click the three dots, copy a link to the database, and paste it somewhere temporarily.
As bolded below, the database ID is after the path and before the ?v.
https://www.notion.so/94582558d50a4cb98234f16973f69c8a?v=1f9c545770334b2091e52c906492143c
Third, you must modify the filter in the body to use the currently viewed URL. So, for example, if somebody is viewing /events/birthday, the URL needs to filter Notion records using birthday.
Click the "+" in the URL field to open the Expression Editor.
Use the following as a template to create your dynamic body:
Be sure to:
Replace "Slug" with the column name you are filtering by.
Replace
system.params.slugwith what you created in the Dynamic Path. You don't need to change anything if you used:slug.
In plain text, the Expression will say, "Hey, Notion, get the record where the Slug value equals the currently viewed slug."
Add a test URL value
Nothing will be retrieved until we give it a test slug value. To do this, go to the Address Bar and manually enter one of the values from the Notion column you are filtering by.
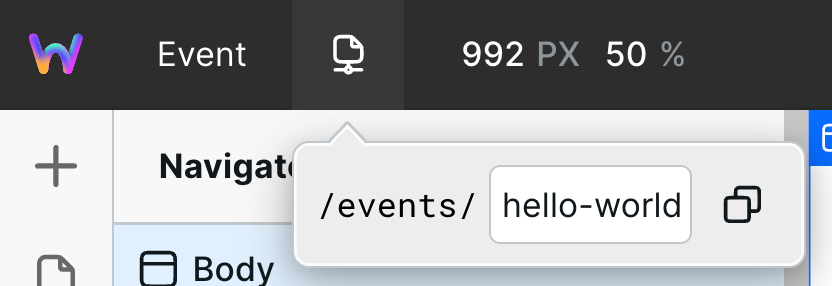
The Address Bar value is for testing. Once you publish the site, the value is whatever is in the URL. Anytime you add data to Notion, you don't need to republish your website. Notion data is dynamically fetched when visiting a page.
Now, go to your variable and inspect it.
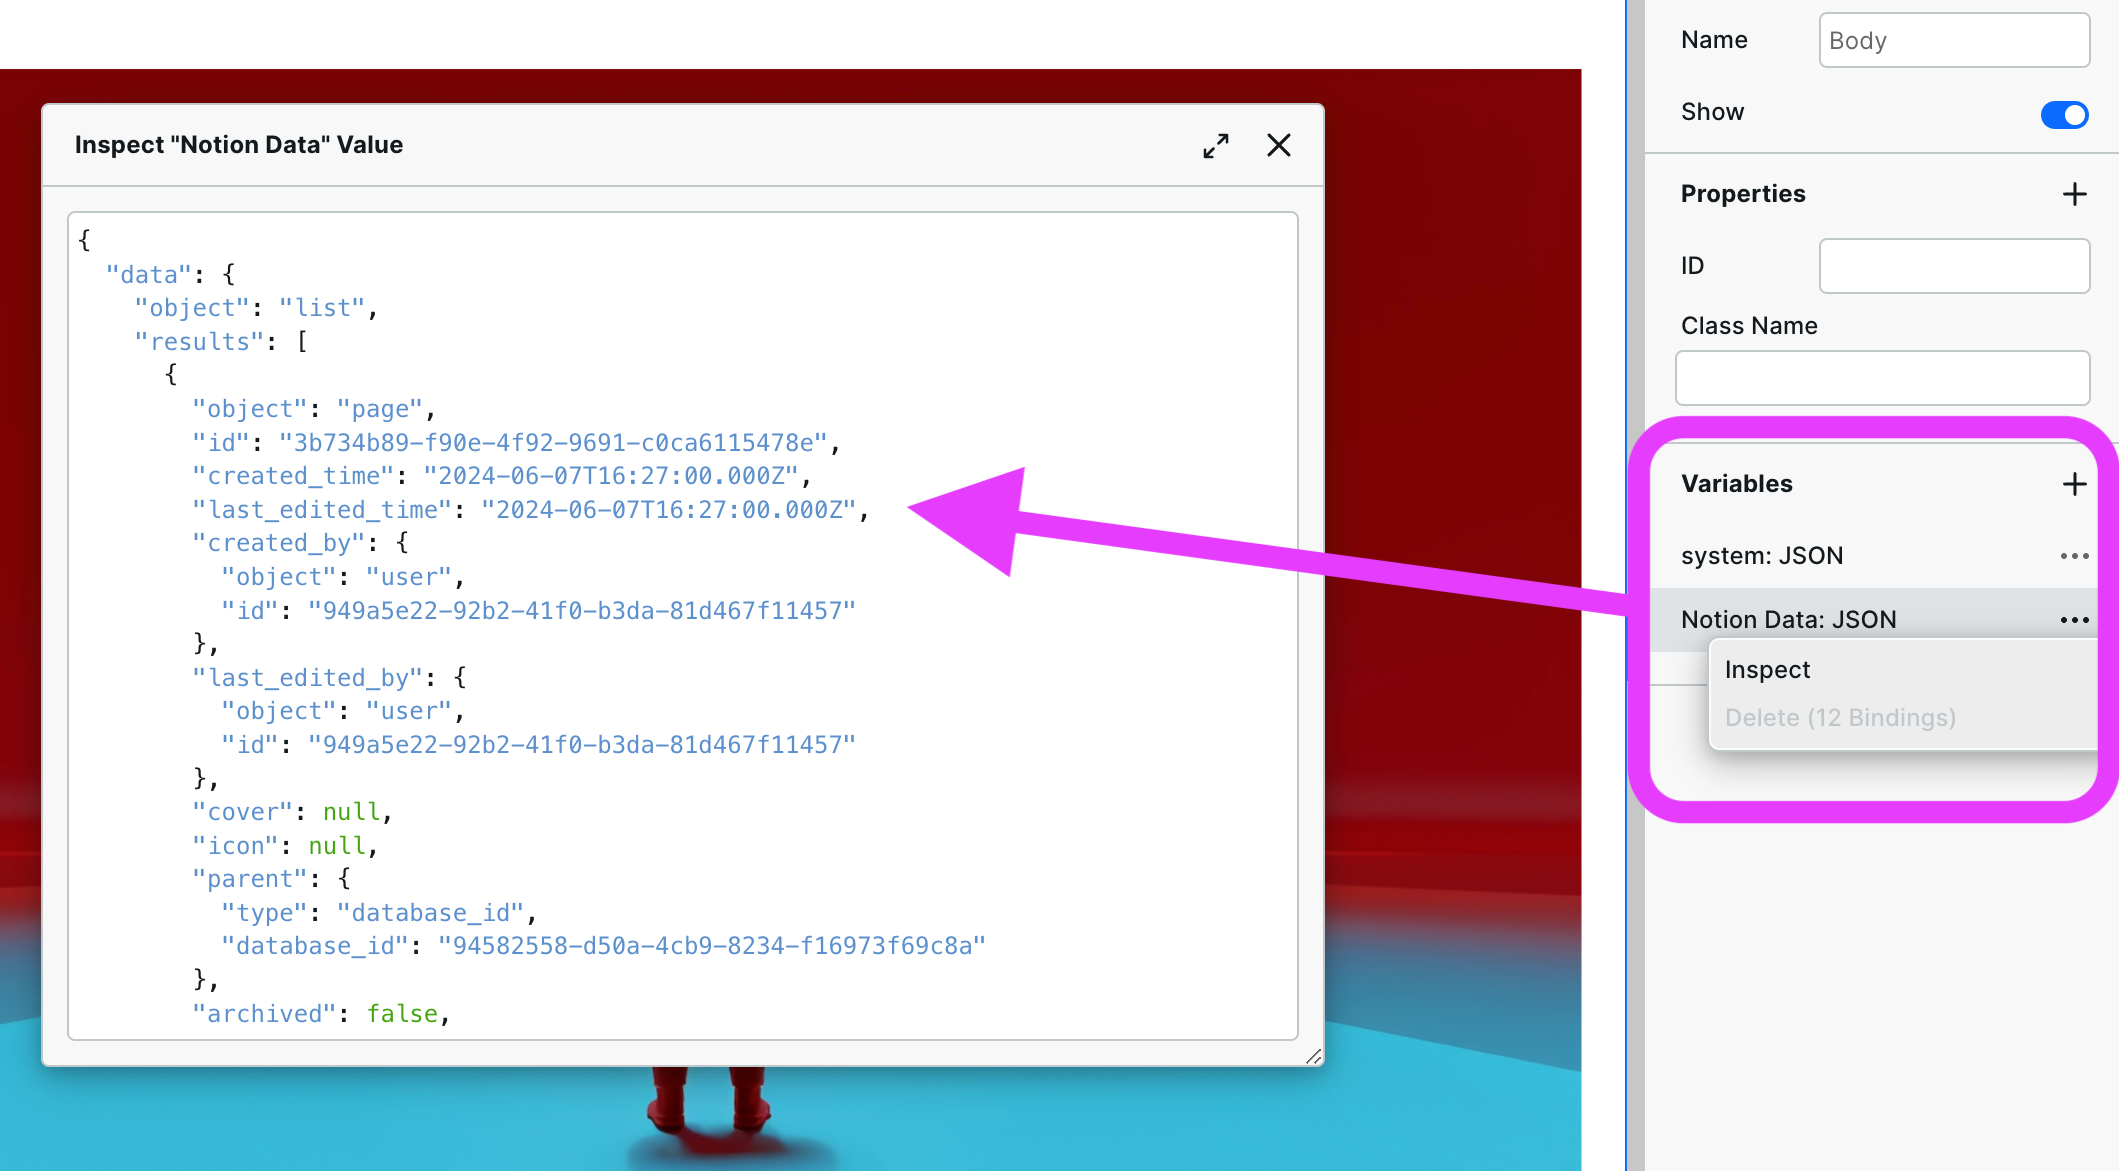
You should see data like the image shows. If you are not seeing data, then there is likely an issue with mapping the value from your dynamic path to the dynamic URL. If you see an error, read it and try to correct it.
Now that you are getting data, you can move to the next step, mapping or "binding" the data to the various components within Webstudio.
3 Bind Notion data to Webstudio components
Binding enables you to connect or map values from the Notion response (aka the Notion data) to the Webstudio components to build your Notion website.
Bind data to components
First, add the various components you want on your page. This example uses a Header, Paragraph, Time, and Image.
Here's a page with the various components with their default values:
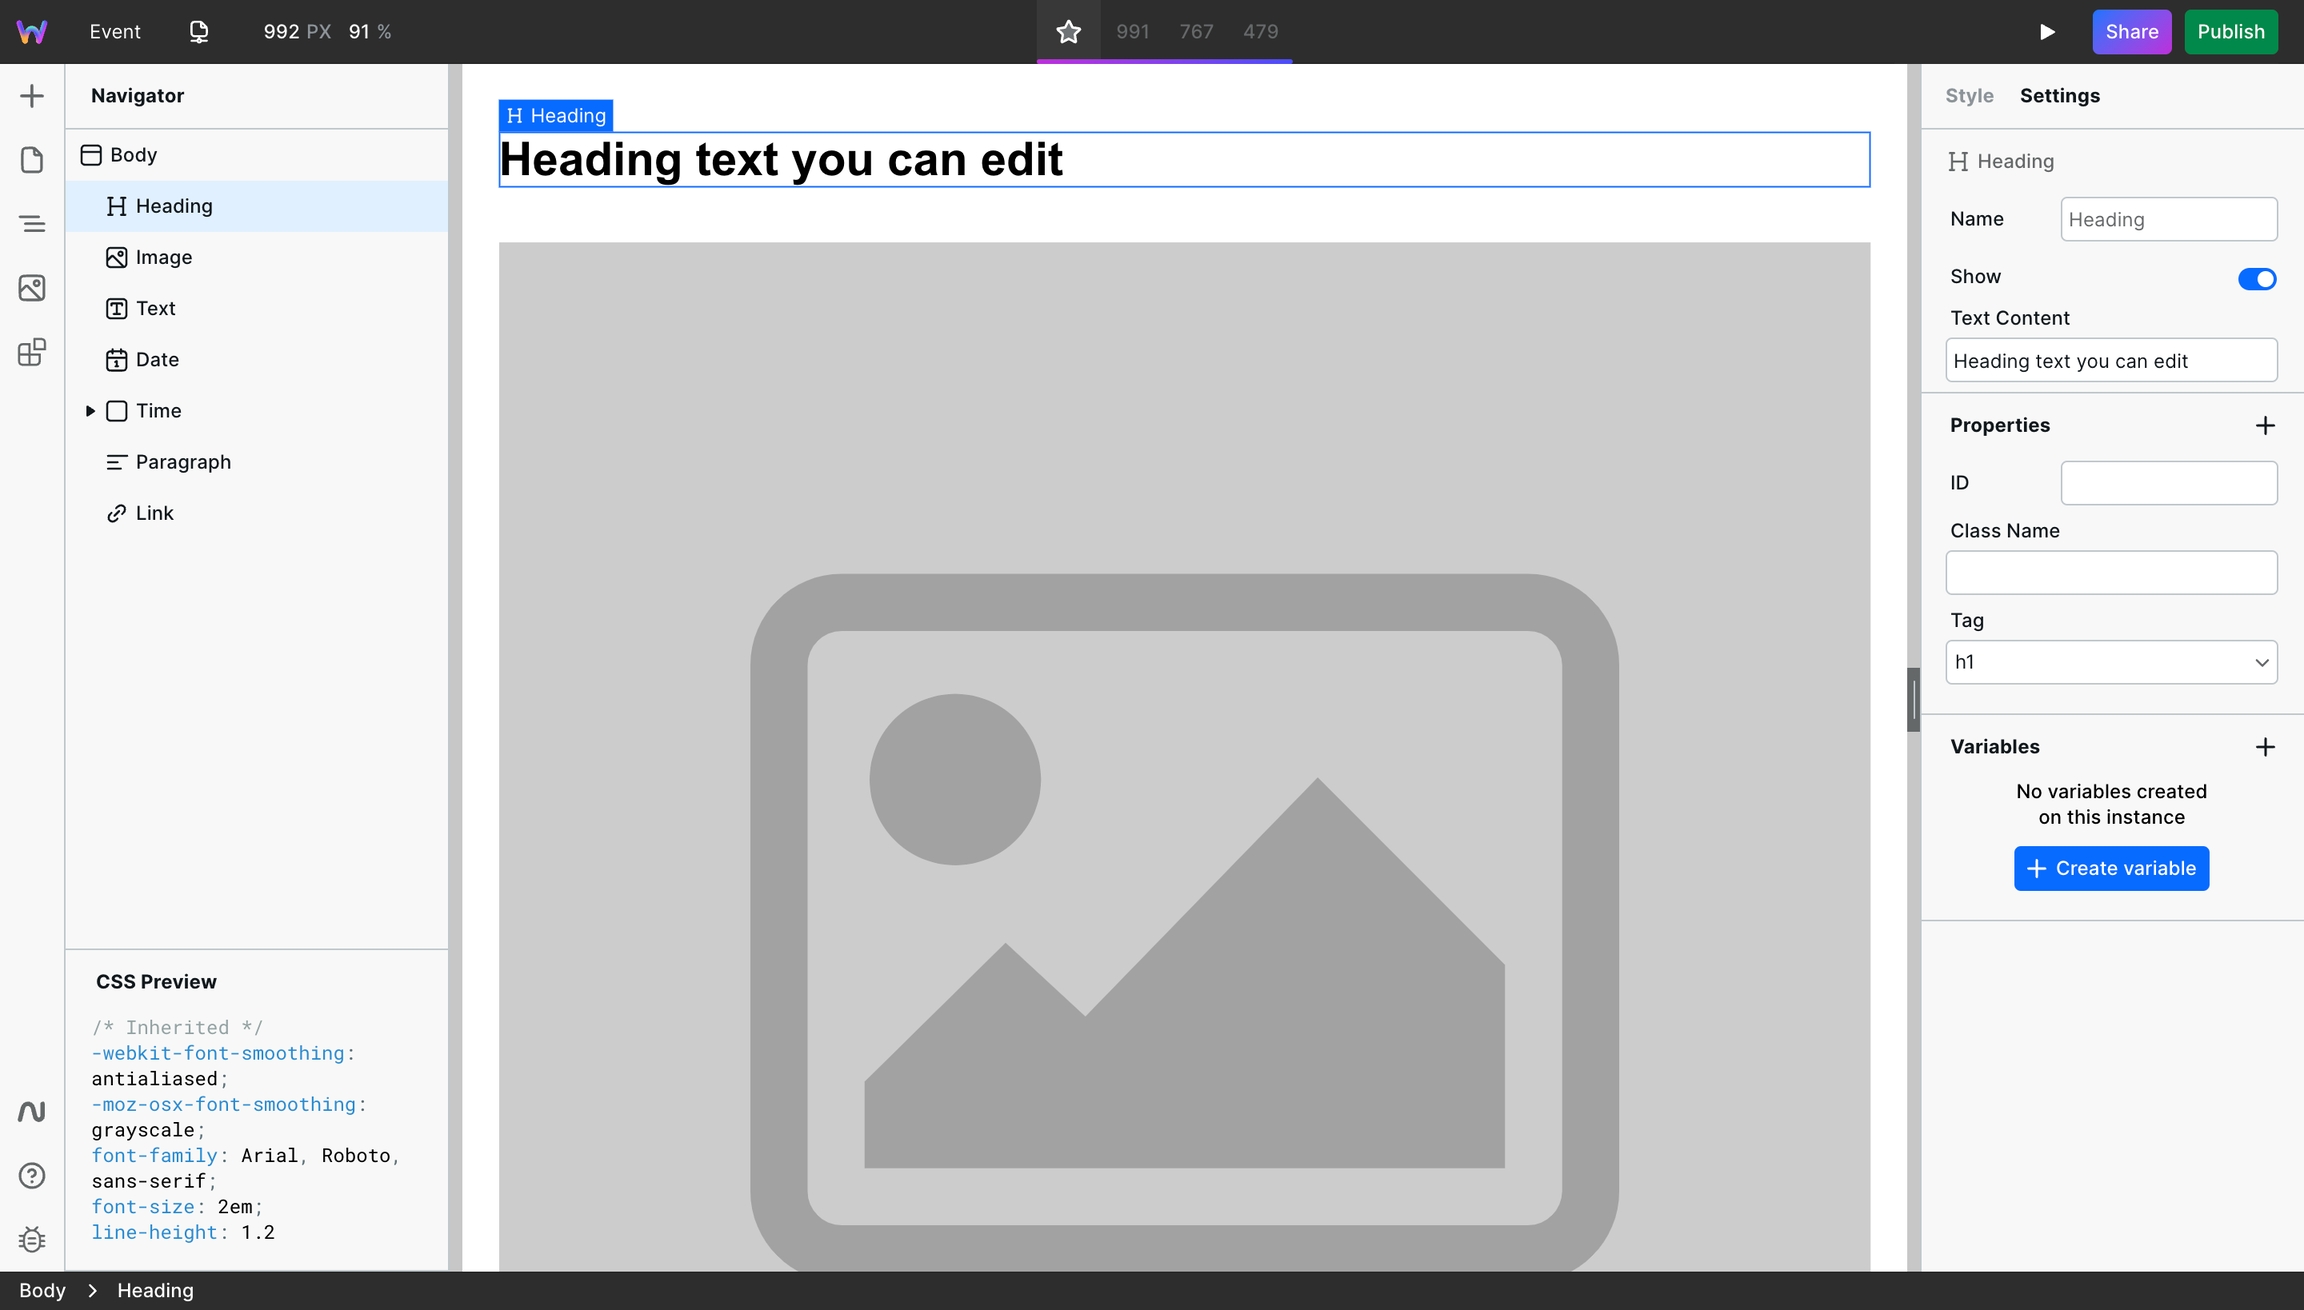
For each component, go to Settings and the field to which you want to attach an external value and click the "+" to open Bindings.
In the Expression Editor, click or type the variable you created previously. From there, "drill down" or access the child fields within the variable by typing a period and selecting the following field (repeat until you get the value).
Notion database properties are contained in: <Your Variable>.results[0].properties
Here is what that looks like:
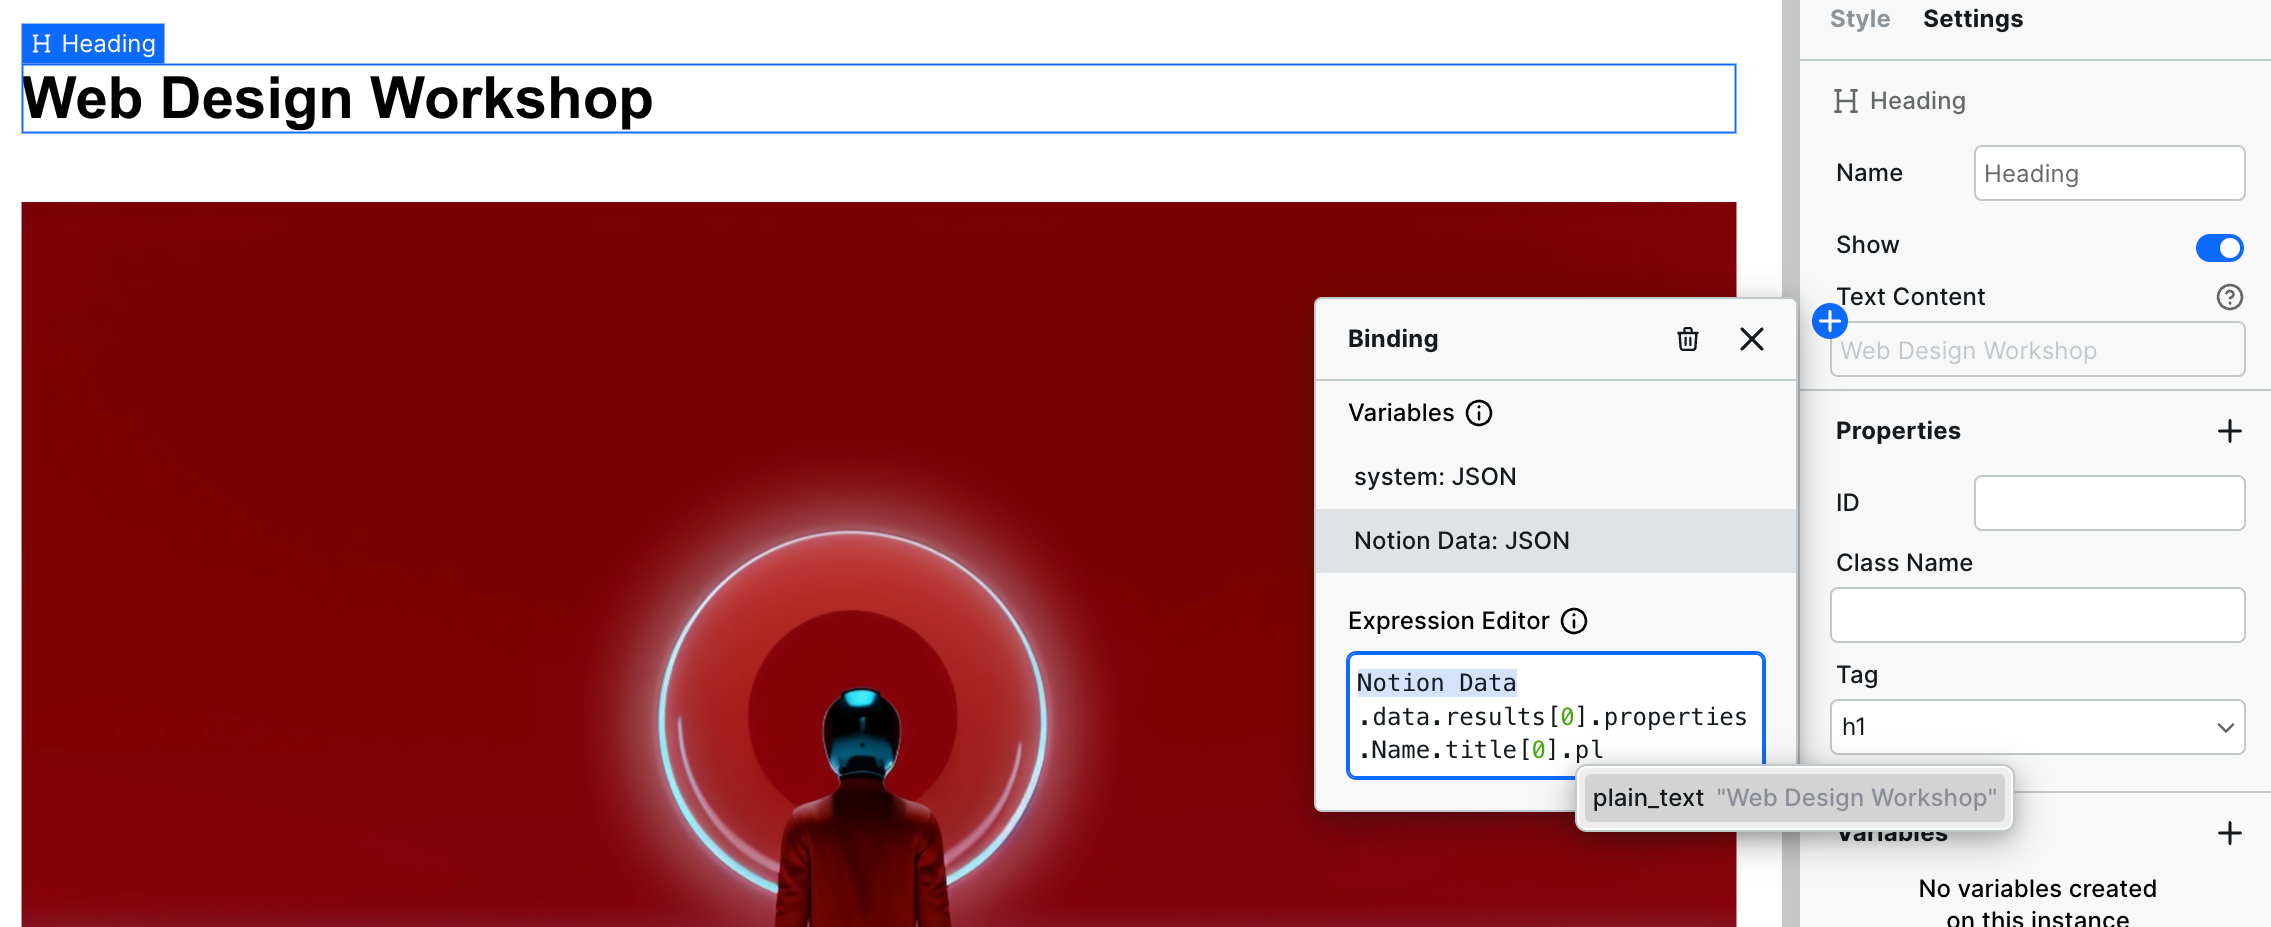
Continue this process for all components. All fields in Webstudio can have Notion properties bound to them, including page fields like Title.
Bind data to Page Settings
Here are the Page Settings bound to Notion values:
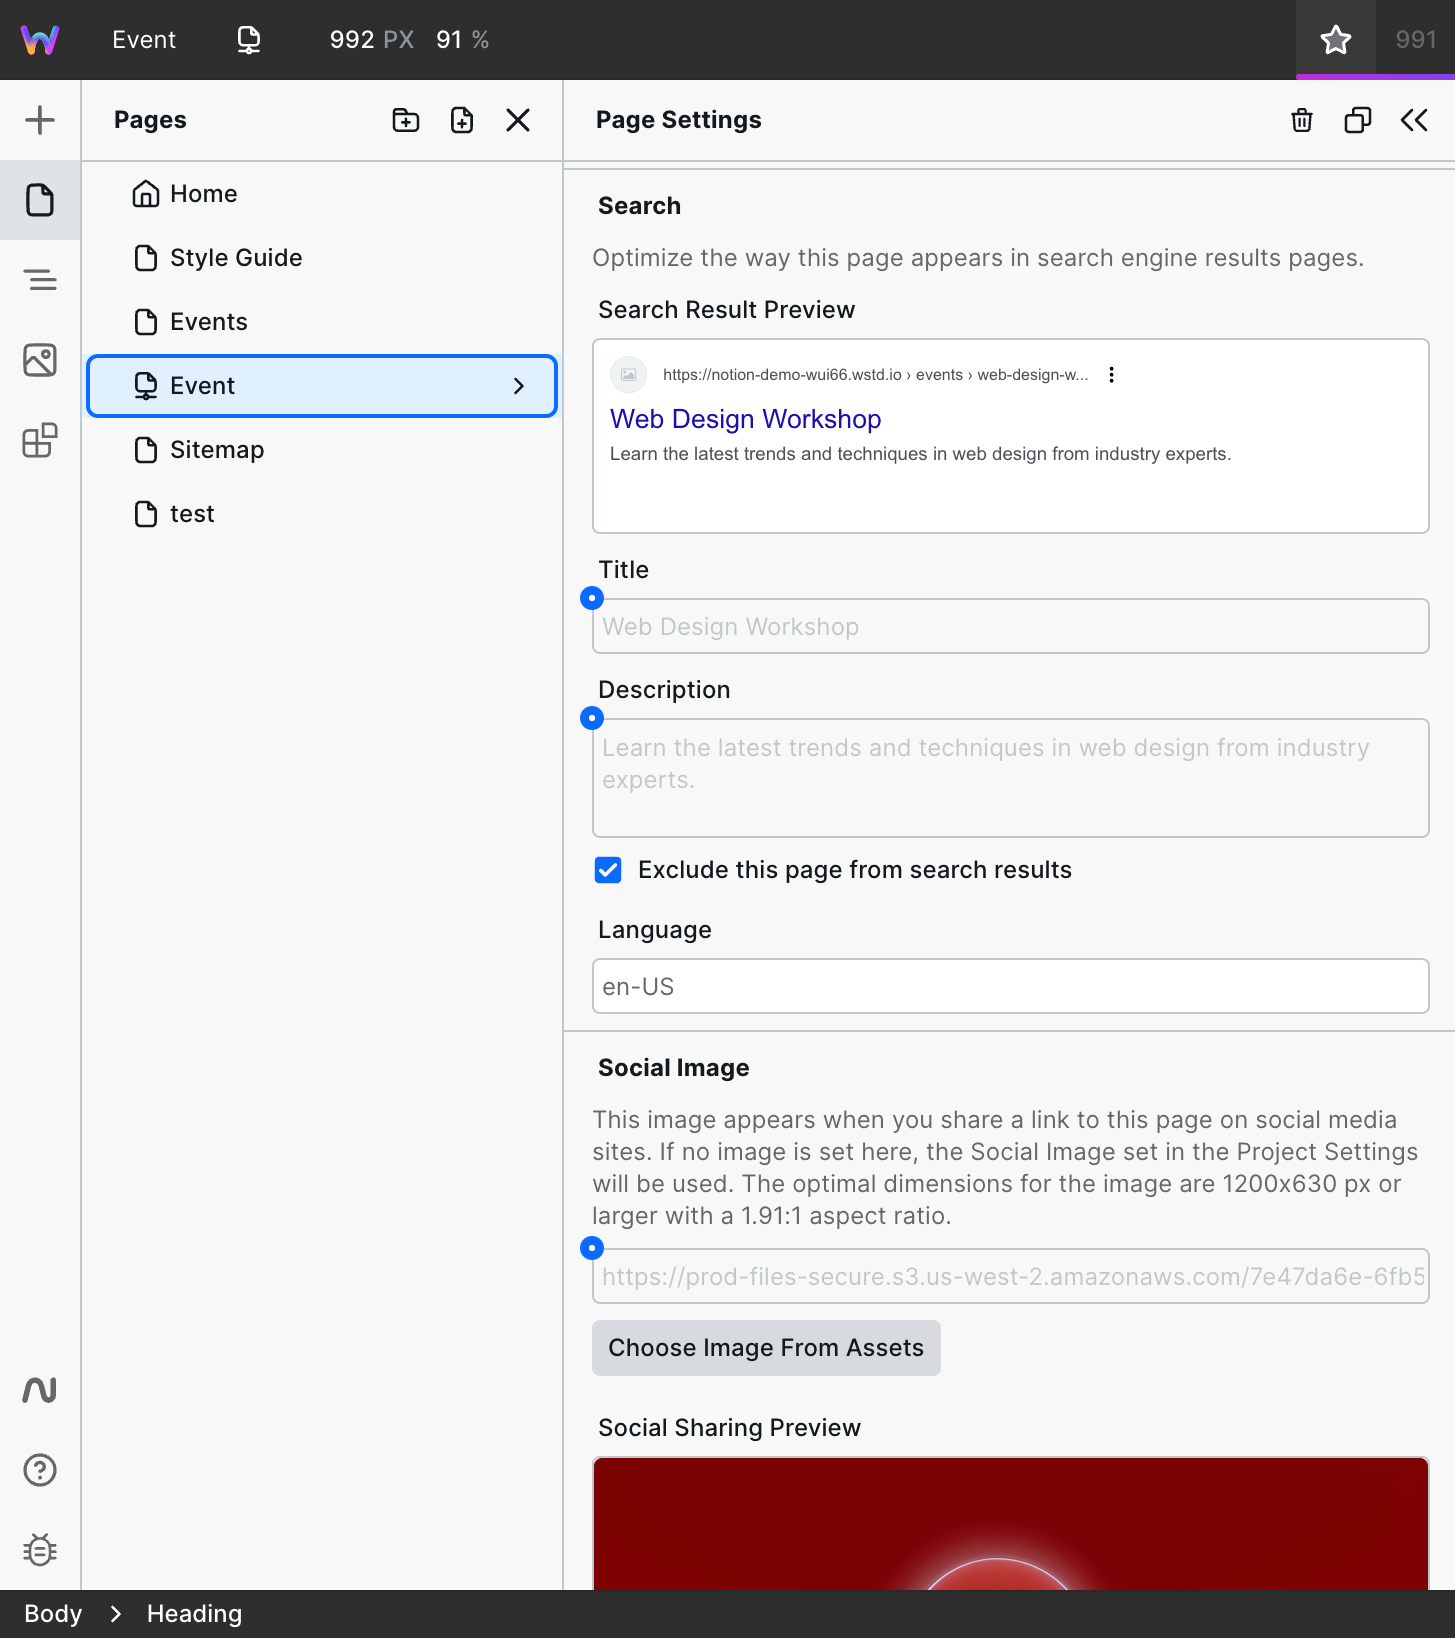
There is one more place to bind: the status code. You want to ensure that if there is no matching value within your Notion, the page returns a 404, not a 200.
To do this, go to Page Settings > Status Code > "+" and enter an expression.
The format will be like this:
Copy
For this example, it looks like this:
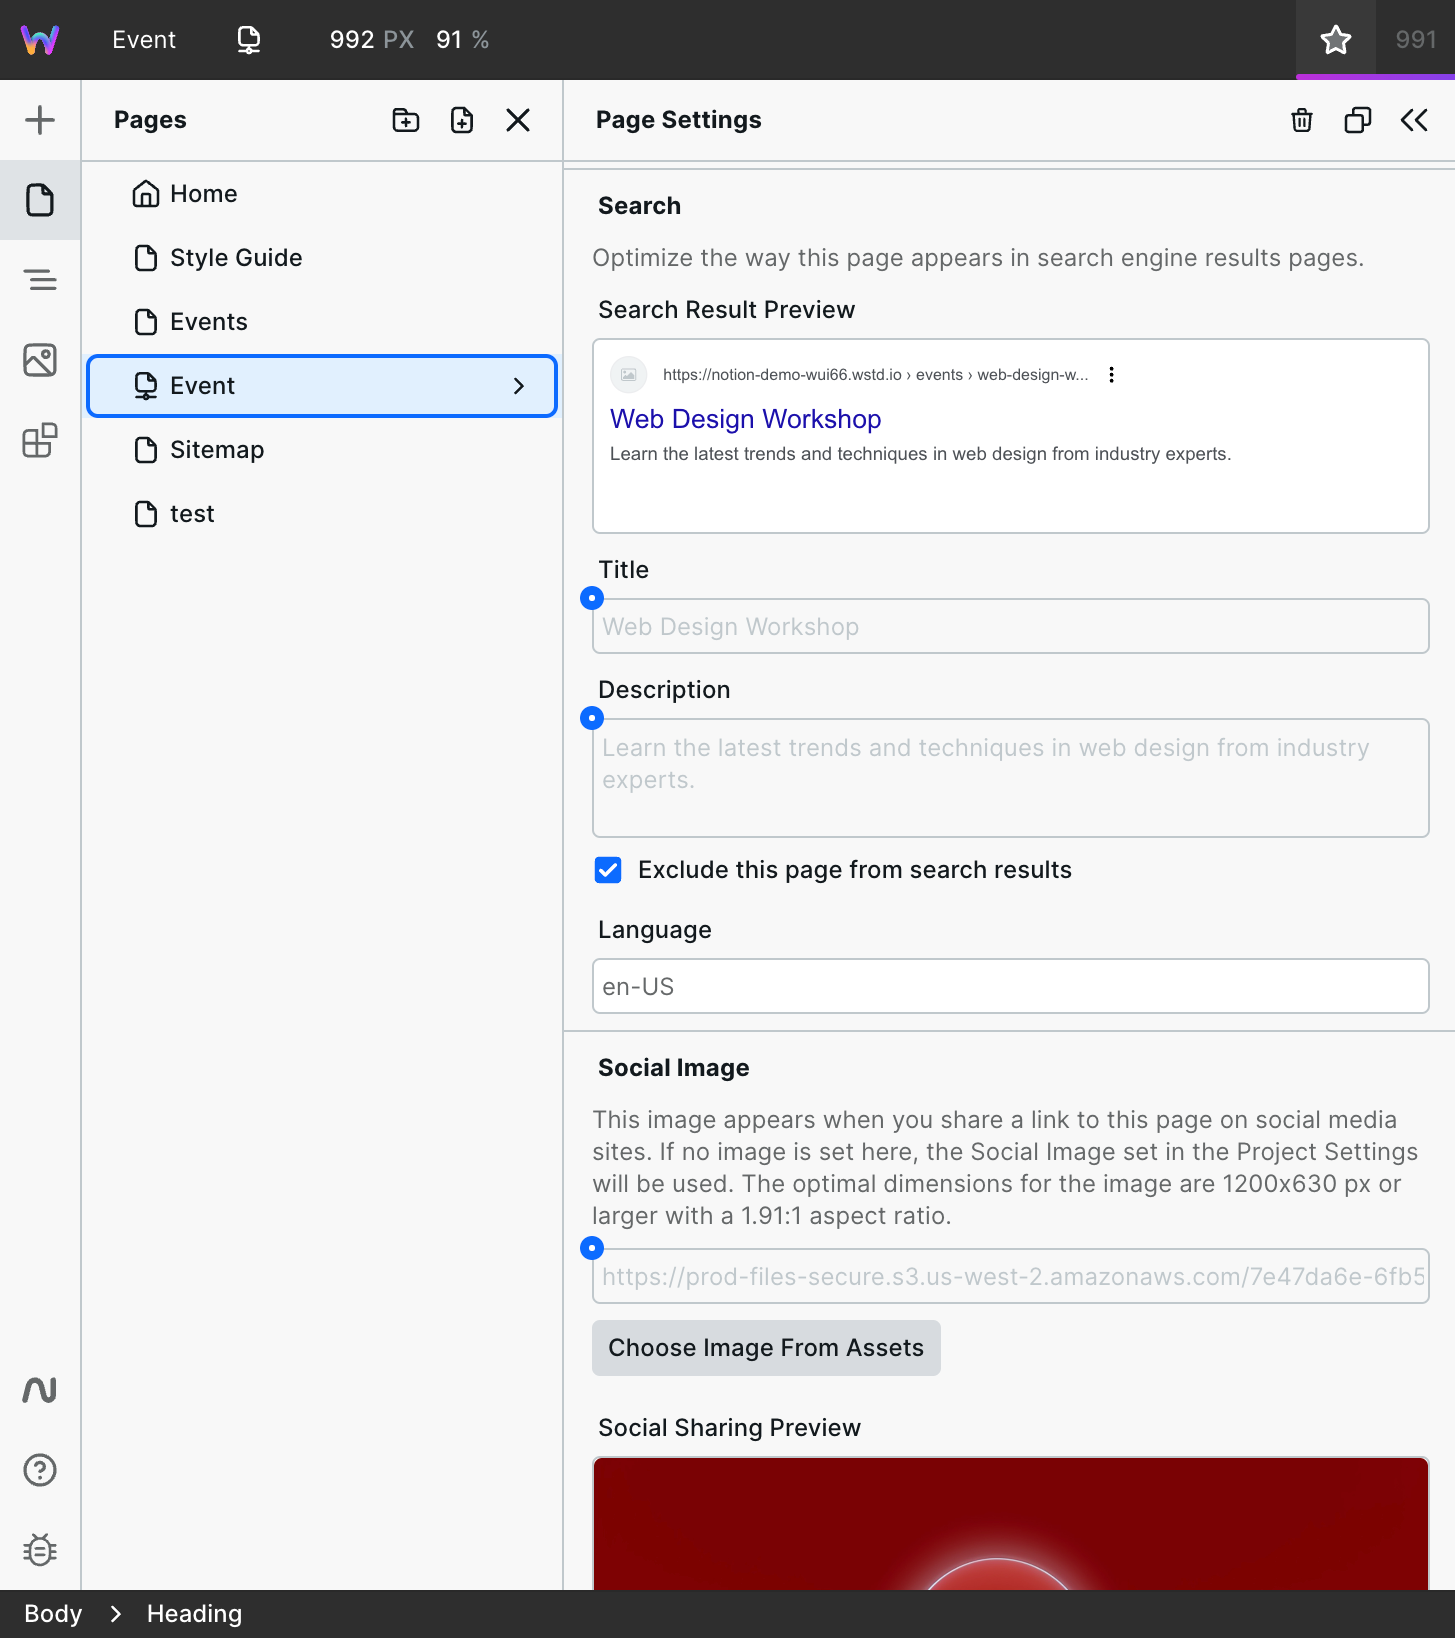
In plain text, the Expression says, "If the Notion record exists, return 200 (found); otherwise, return 404 (not found).
Well done! So far, you have successfully created a Dynamic Page, fetched the data from Notion, and bound the data to Webstudio Components. In the following steps, these same concepts will be used to create an overview page with your various records on one page and a sitemap for search engines.
4 Create an overview page
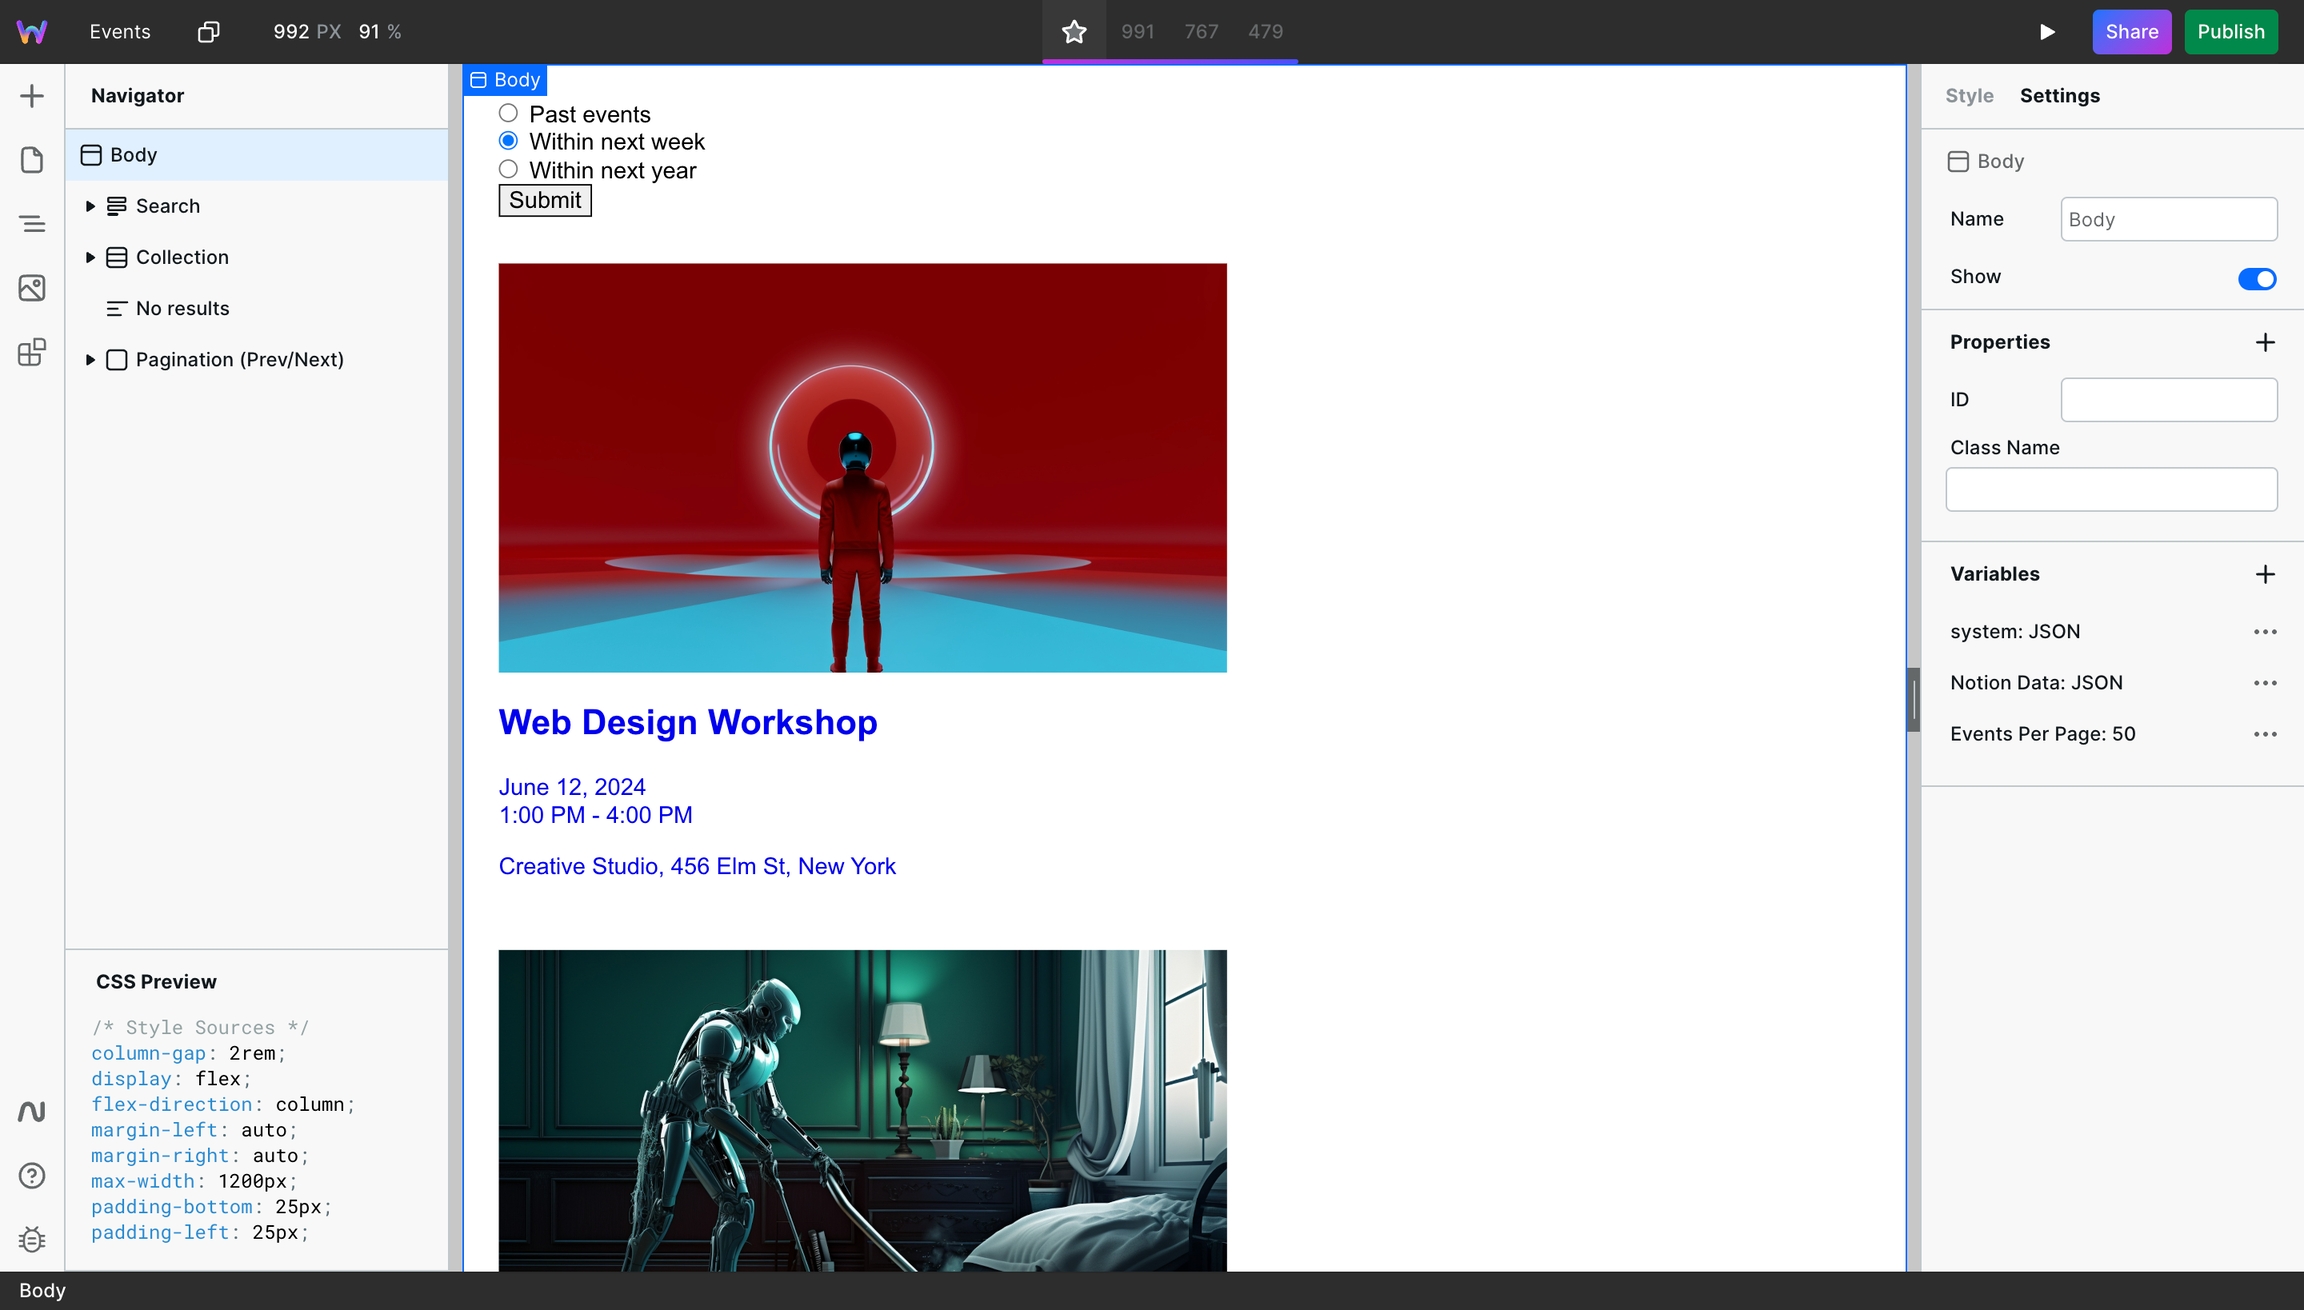
In this step, you will create a page that lists the various Notion records and links them so that users can click on them and land on the Dynamic Page containing the proper data.
Create a new page
Create a new page and ideally give it the base path of the Dynamic Page. So, if the Dynamic Page uses /events/:slug, this new page should use /events.
Create a new Resource variable
Create a new variable, same as last time, except no body field is needed.
The Marketplace contains a filter property that sorts, paginates, and filters events based on user input.
Setup a Collection
Add the Collection component, which will iterate over a list of the records. You can design what a record should look like once, and it will replicate it for each record. You need to bind the list of records to the Collection. Here's what that looks like:
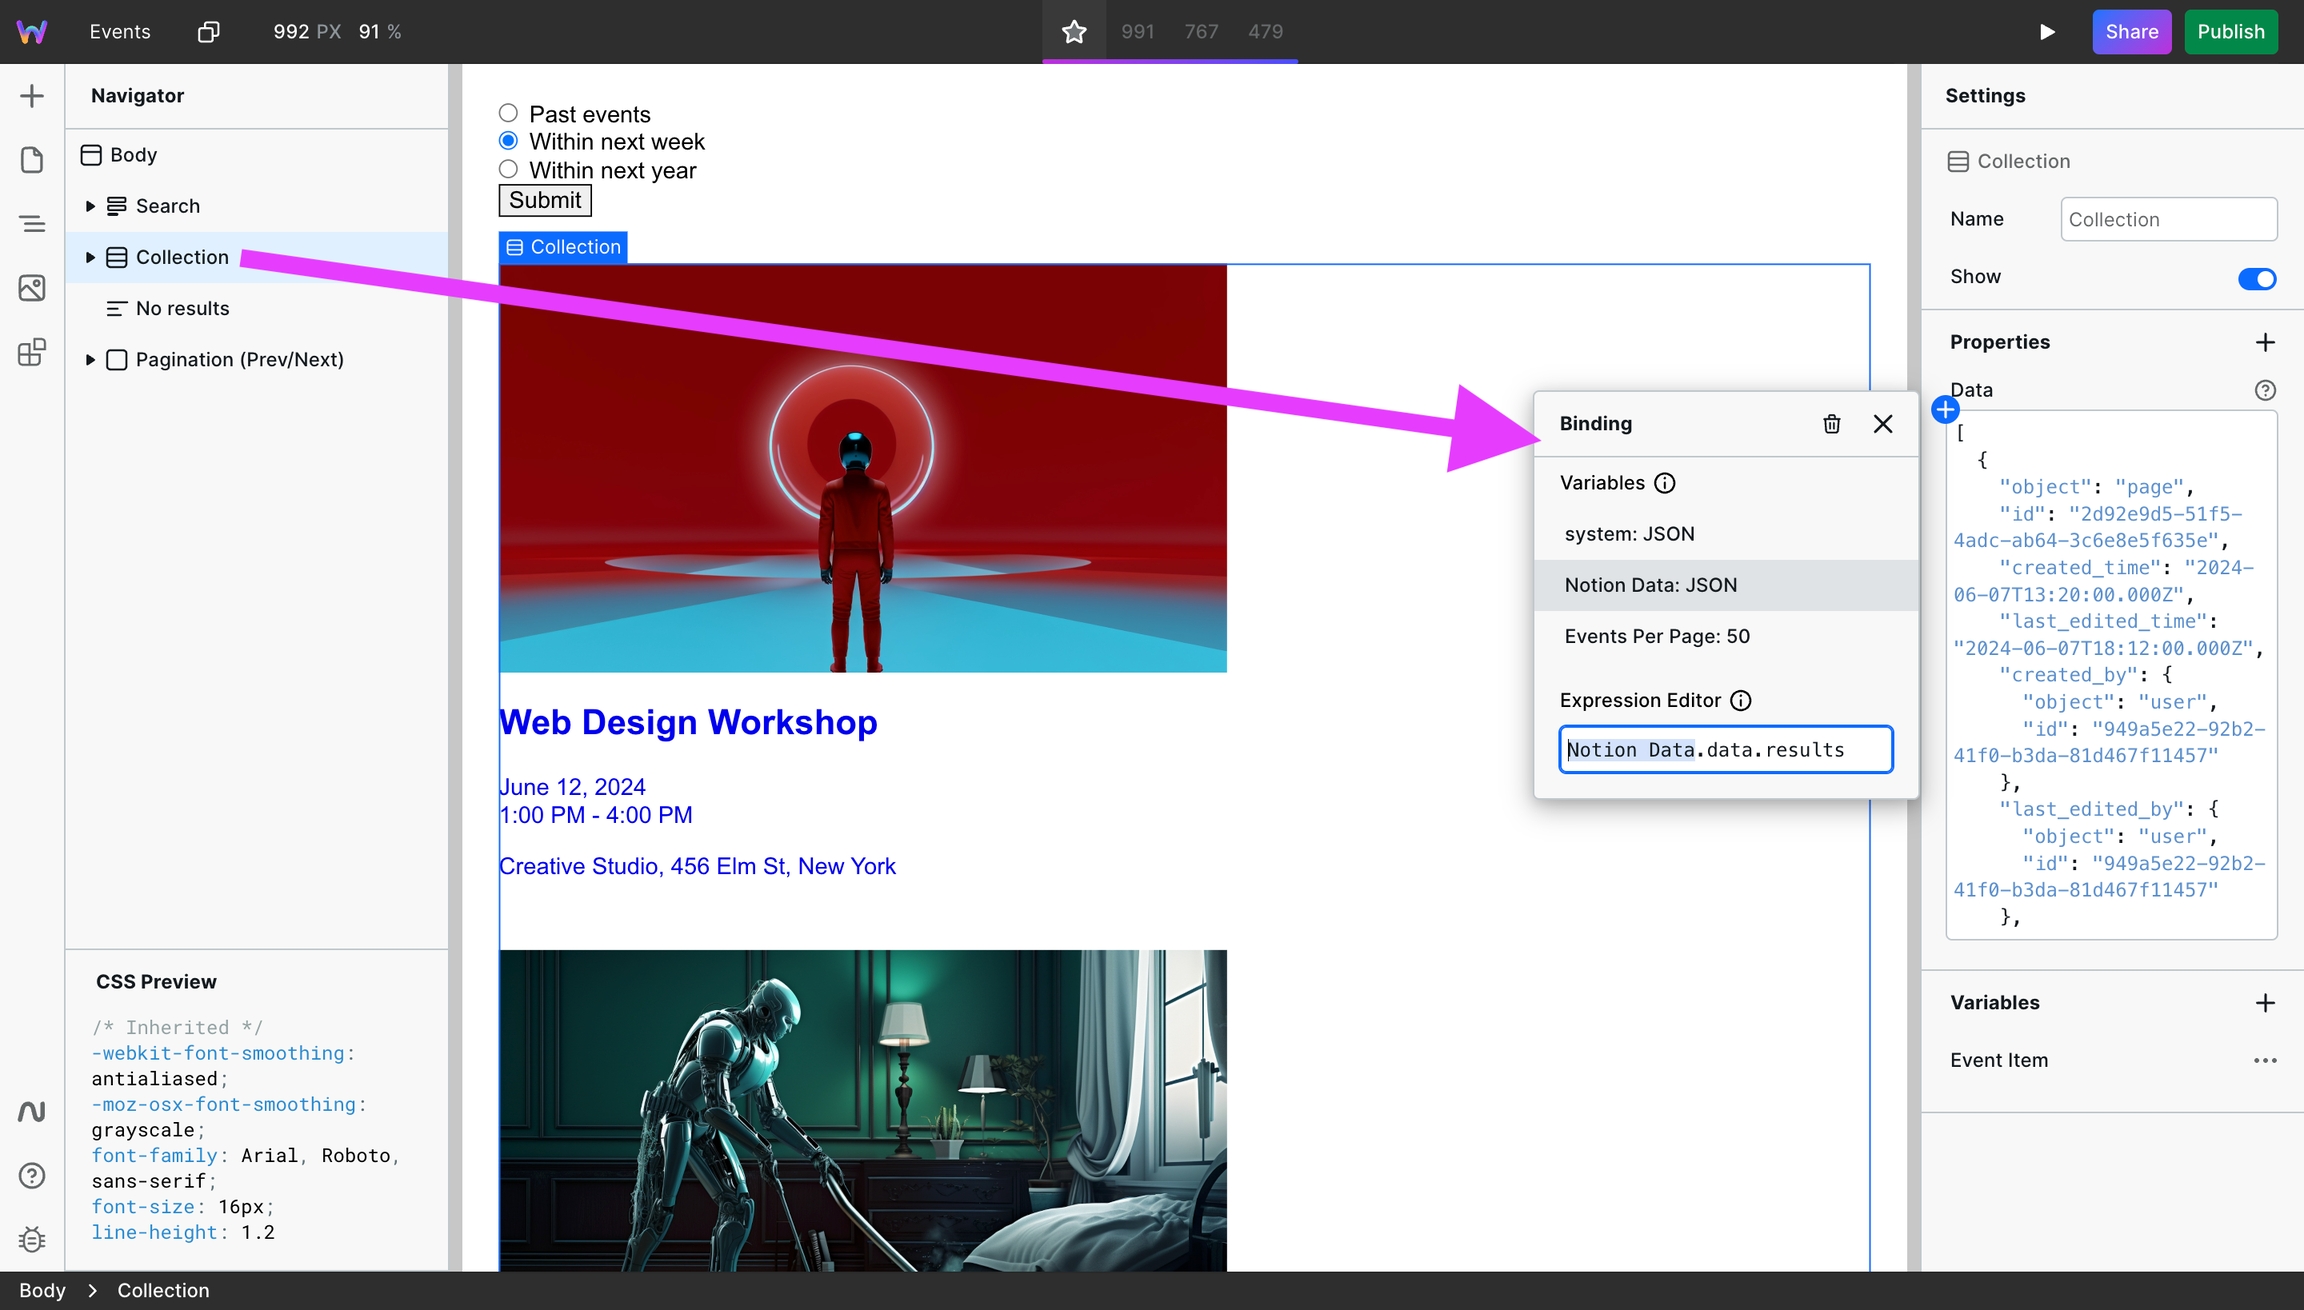
The Collection has a default variable containing the value of the current iteration's record. The default name is "Collection Item"; however, you can rename this to "Event Item" for clarity.
Bind data to components
Next, bind the various values to the components, as you learned previously. You'll need to do something special for the link: prefix the slug with the base path.
Here is what that looks like in this example:
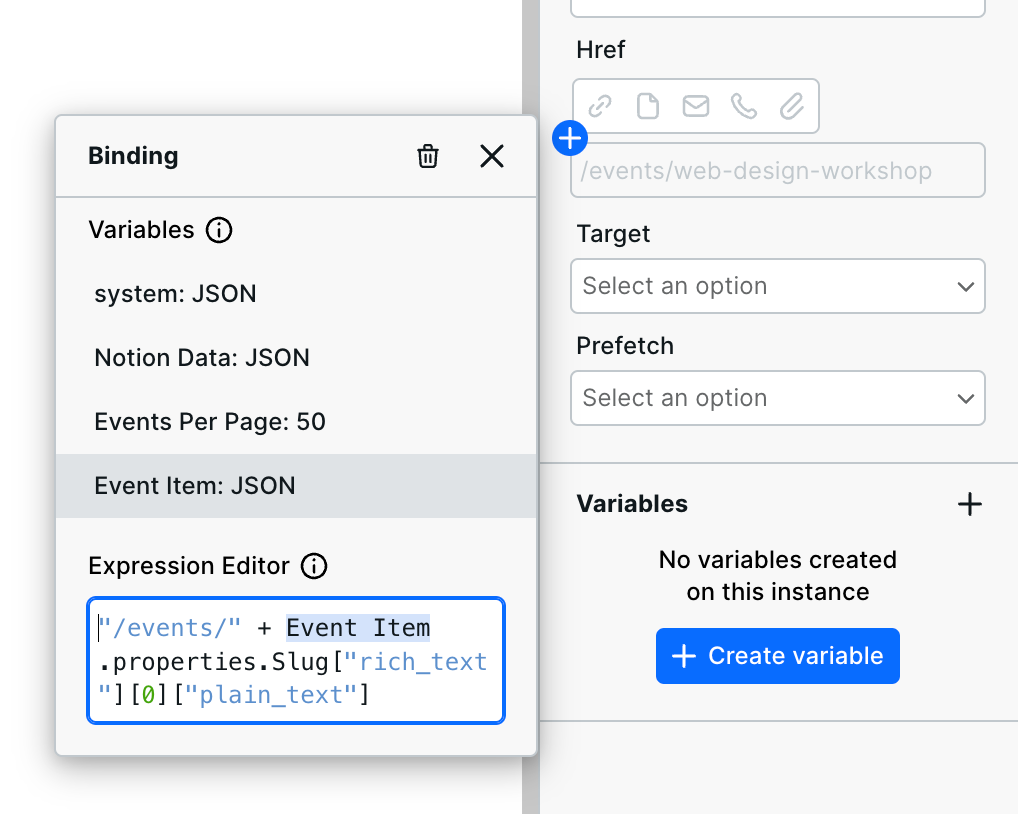
Note that the static value is in quotes ("/events/"), and there is a "+" to glue it together with the dynamic slug value.
5 Create a sitemap for search engines
Webstudio enables you to visually build a dynamic sitemap using Collections and XML Nodes.
The sitemap helps Google and other search engines discover pages on your website and understand when they were last updated. Building a sitemap is a key step in making your Notion website SEO-friendly.
Here's how to do it:
Go to Marketplace > Pages > CMS Sitemap > and click Sitemap. This will insert a template sitemap.
Add a new Resource that fetches your slugs and, optionally, the record's updated time to inform search engines when the last edit was made. You can add a column to your data with the "Last edited time" property, which automatically outputs the last time you edited that record.
Bind those values.
Refer to this video chapter for a full video demonstration on building a sitemap containing Notion data.
Start using Webstudio to build Notion websites
With Webstudio, you can build a Notion site, including a record overview page, a dynamic page displaying each record, and a sitemap – all without writing code!
The flexibility of Resources enables you to fetch exactly what you need from one or more Notion Databases and even multiple systems together (e.g., Airtable for team members, Hygraph for blog posts, and Notion for events).
Related
CMS – Learn about dynamic pages and Resources in Webstudio
Variables – Understand how to create and use Resource variables
Collection – Display multiple records from your data source
Airtable Integration – Another popular CMS option for Webstudio
Hygraph Integration – Build a frontend for Hygraph using Webstudio
Last updated
Was this helpful?

